Overview
This guide is intended to help you walk through the essential settings for creating a new product in rezio Admin. The following will cover adding product information, itineraries, sales options, pricing, cancellation policies, deposit policies, booking information, and more.
Product > Add Product
Log in to rezio Admin, and click Add Product on the menu, or click + Add in the Product List to begin product setup.

In the rezio system, creating a product can be simply broken down into the following steps:
The following will explain the common fields that every product must have, starting from the "Fill in Required Settings" step.
Add Product
Edit Product
After the product has been successfully created, you can start editing the content. Tabs marked with an star (*) are required fields:
Tabs that have been completed will be marked with a green checkmark. Once all required fields are filled, the system will prompt that You have completed all steps, and the sales status will change to [Available for Sale]
Next, we will introduce the fields and settings contained within each of the required tabs.
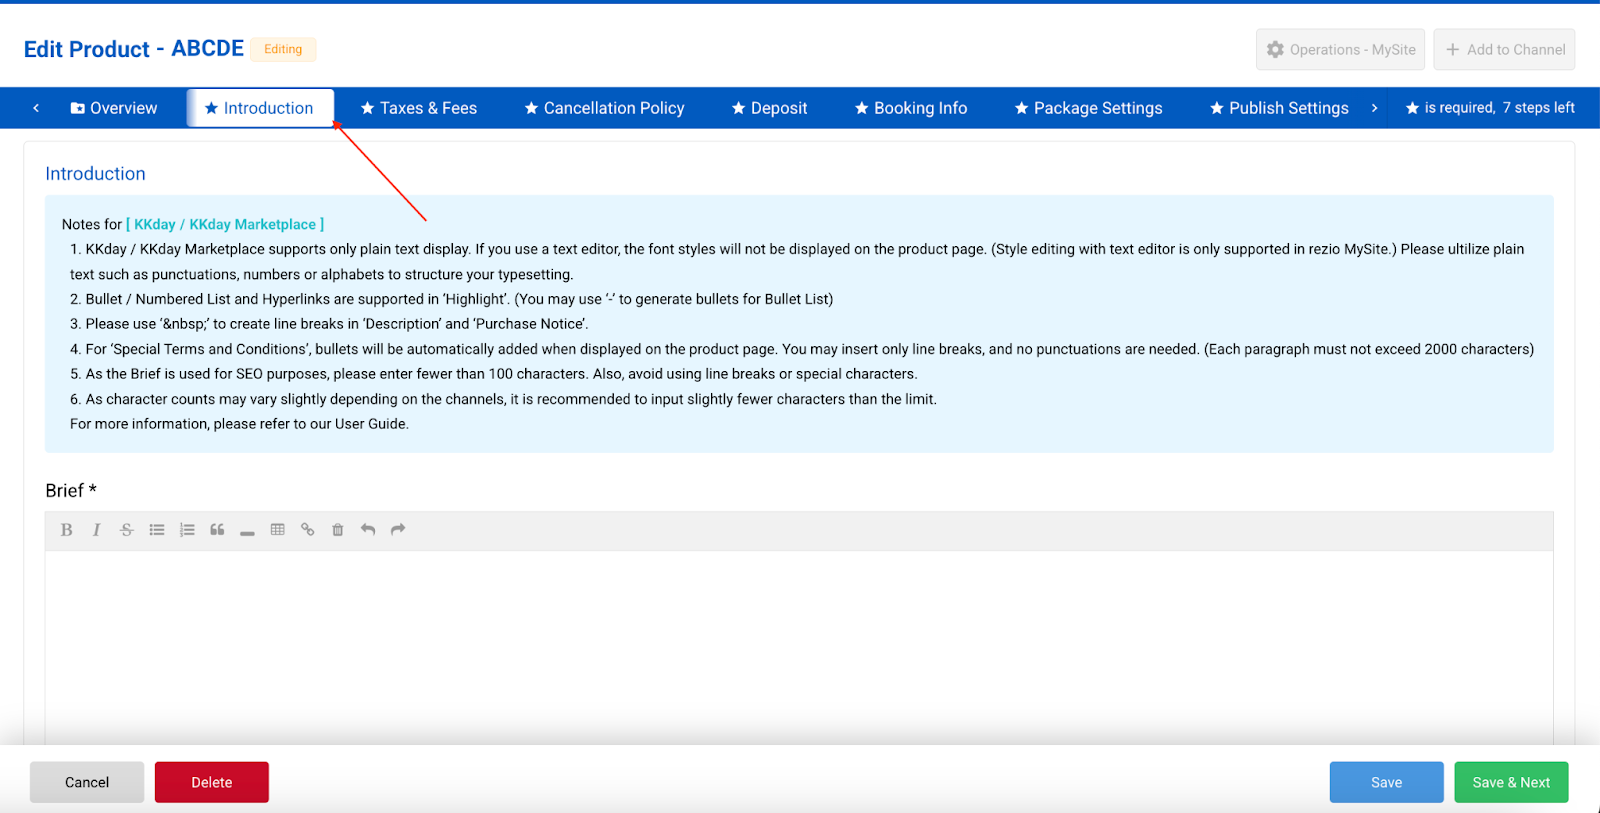
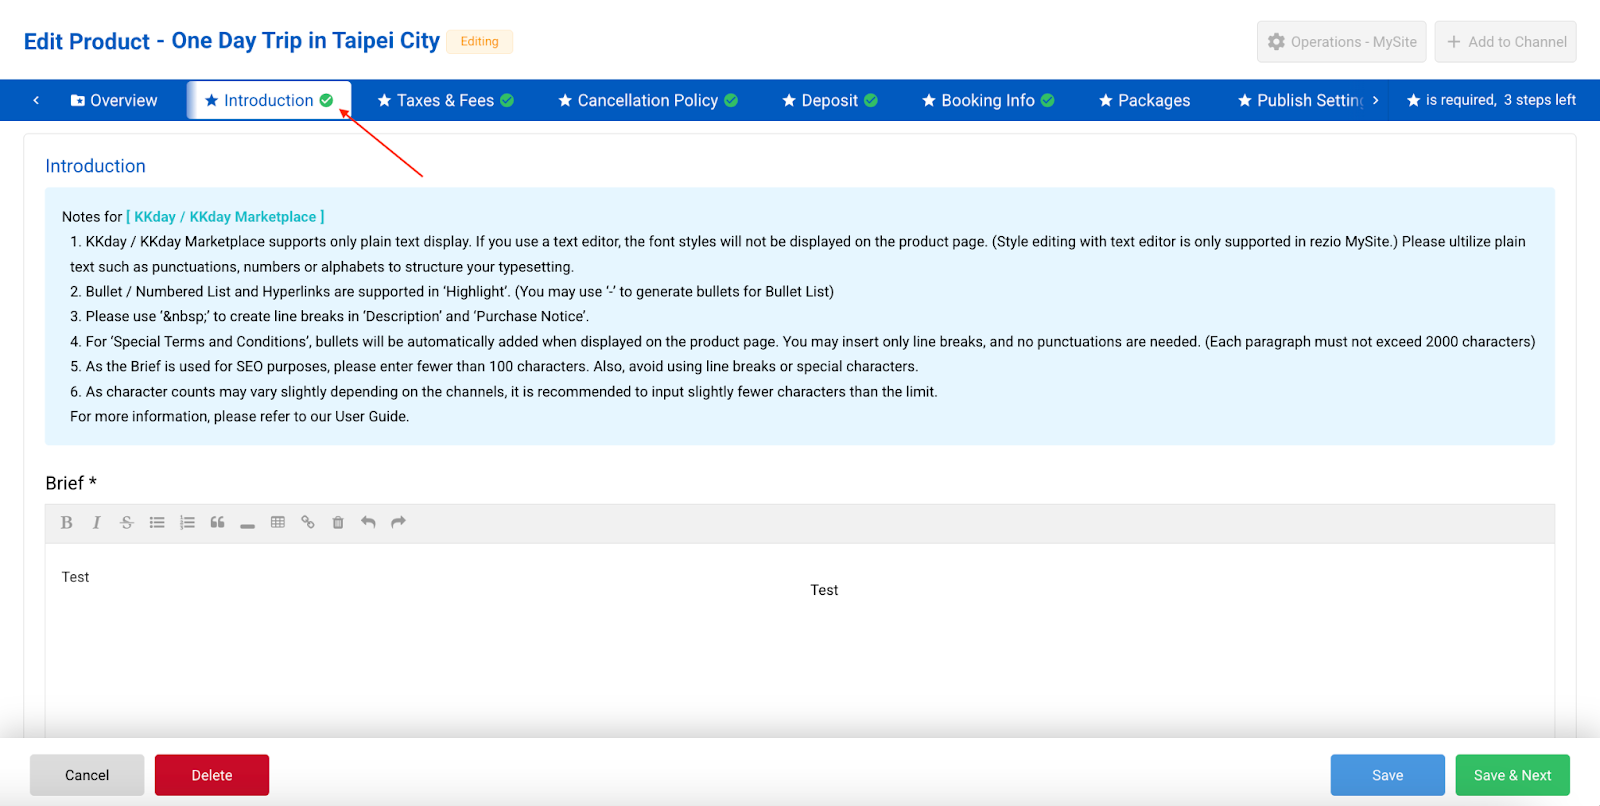
Product Introduction
The fields in this tab form the main content of the front-end product page, including the Product Brief, Highlights, Description, Purchase Notice, Participant Restrictions, Special Terms and Conditions, Product Images, and Youtube video.
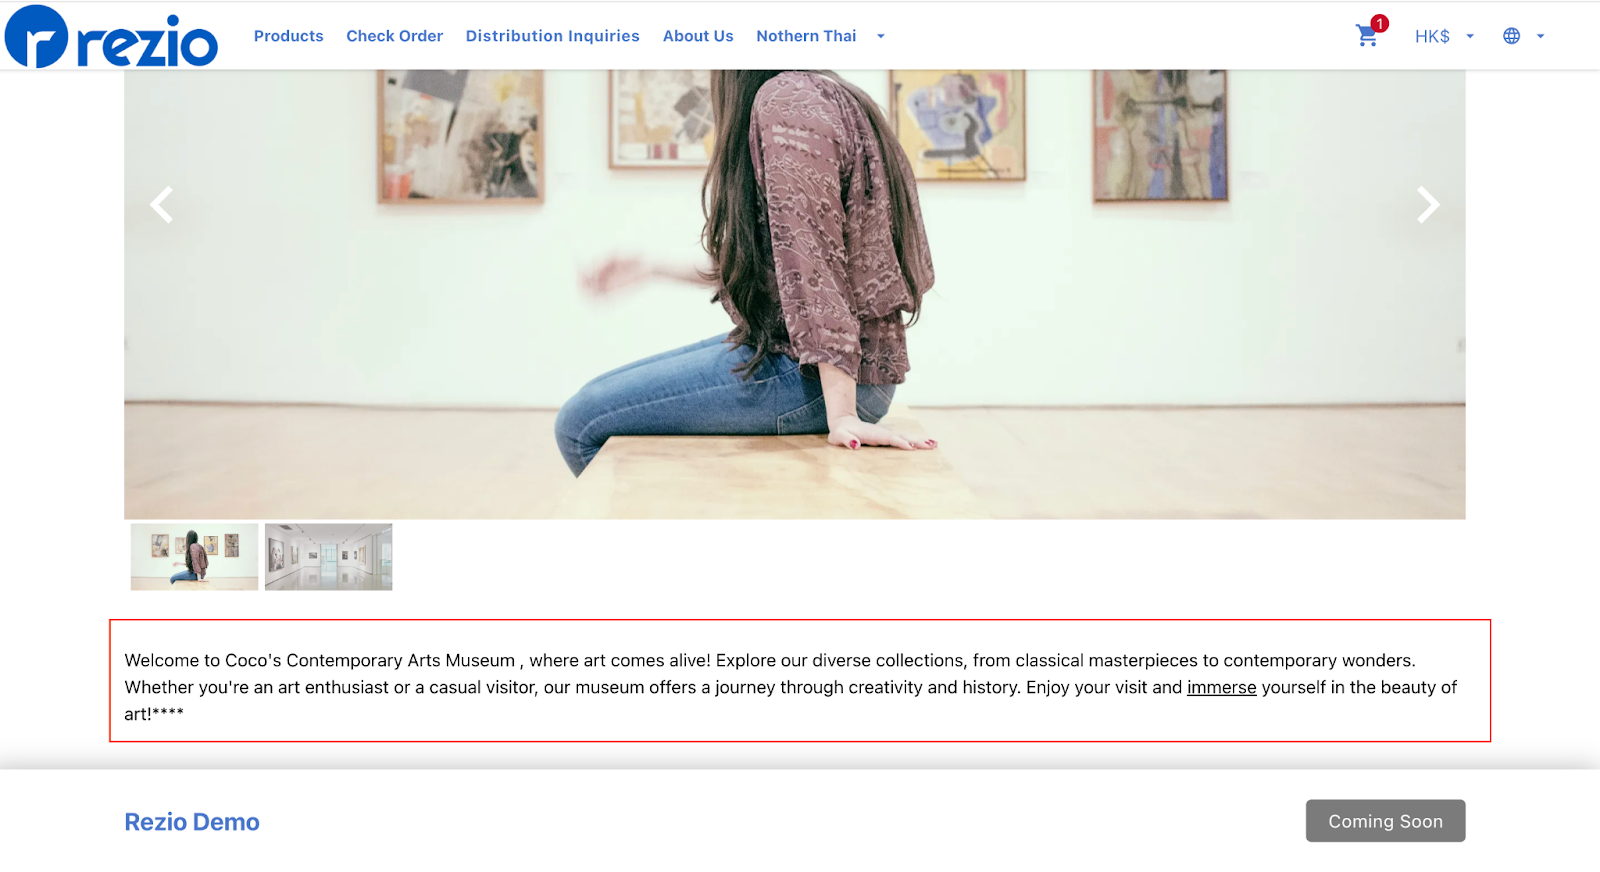
To illustrate the front-end display effect, the mobile version of the "MySite" product page will be used as an example below. Any section without filled-in fields will not be displayed. Additionally, if you supply the product to KKday or the KKday Marketplace, the content will be displayed in the corresponding fields according to the KKday product page style.
If you list the product on Viator or GetYourGuide channels, the product description data will not be transmitted to those channels. You must create the corresponding product separately on that channel and then link it to the rezio product.
Text Editor
The content on this page can be formatted and given simple layout adjustments using the built-in Markdown Text Editor. For detailed usage instructions, please refer to the Text Editor User Guide.
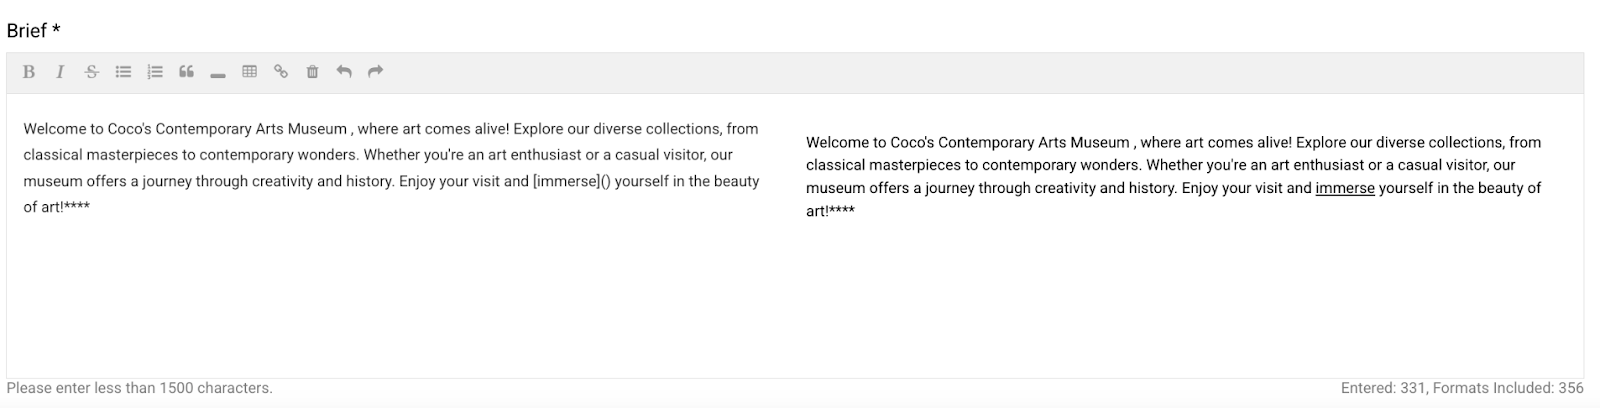
Product Brief(Mandatory)
You can briefly describe the key highlights of the product to entice customers to check the detailed content below.
Display Location on the MySite: At the very top of the product page.

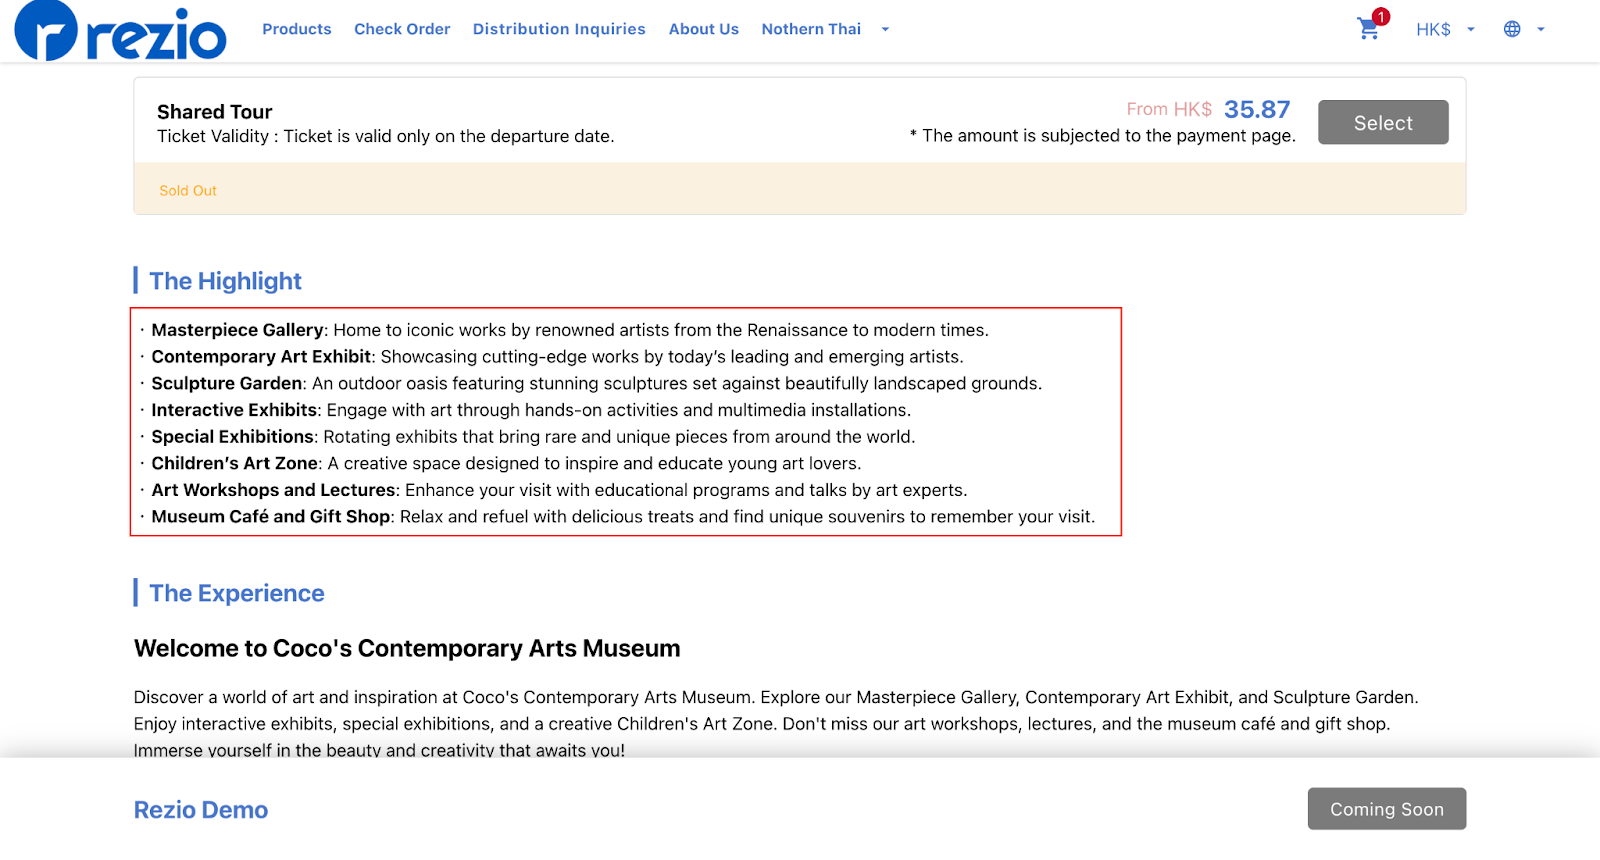
Product Highlights
This field allows you to list the main selling points of the product. What makes it unique? What kind of experience do customers get? Does it include any special services or items? What is the best season or time for the experience?
Display Location: In the "Highlights" section, found below the package options on the booking website.
Product Description (Mandatory)
This field is for describing the detailed content of the product, an introduction to the activity venue, and the daily itinerary route, etc.
Display Location on the MySite: In the "Description" section, located below the package options.
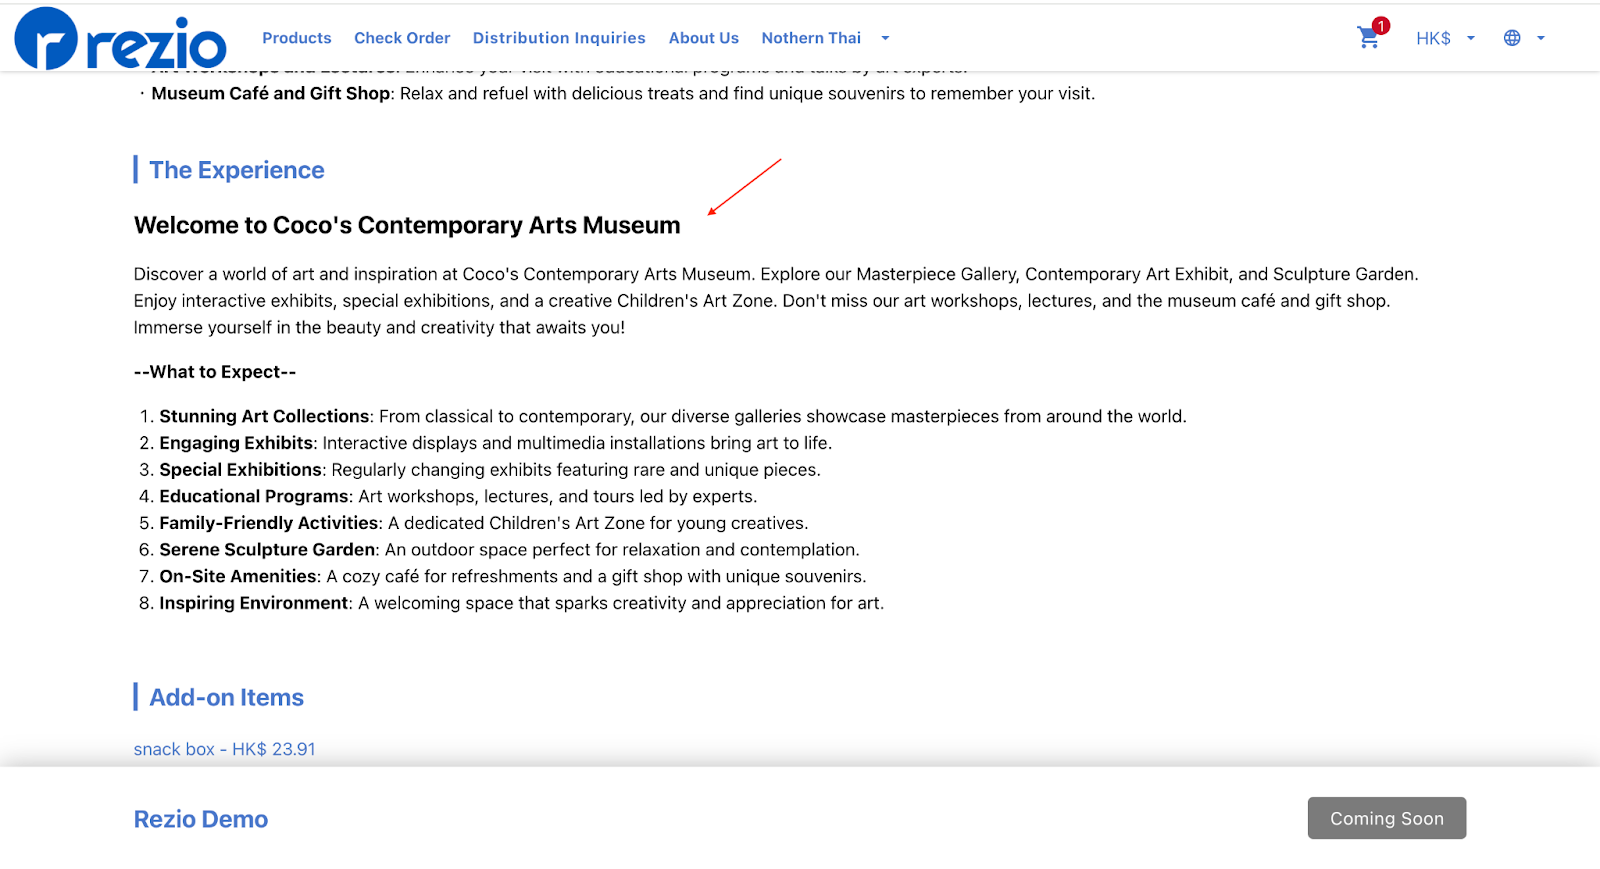
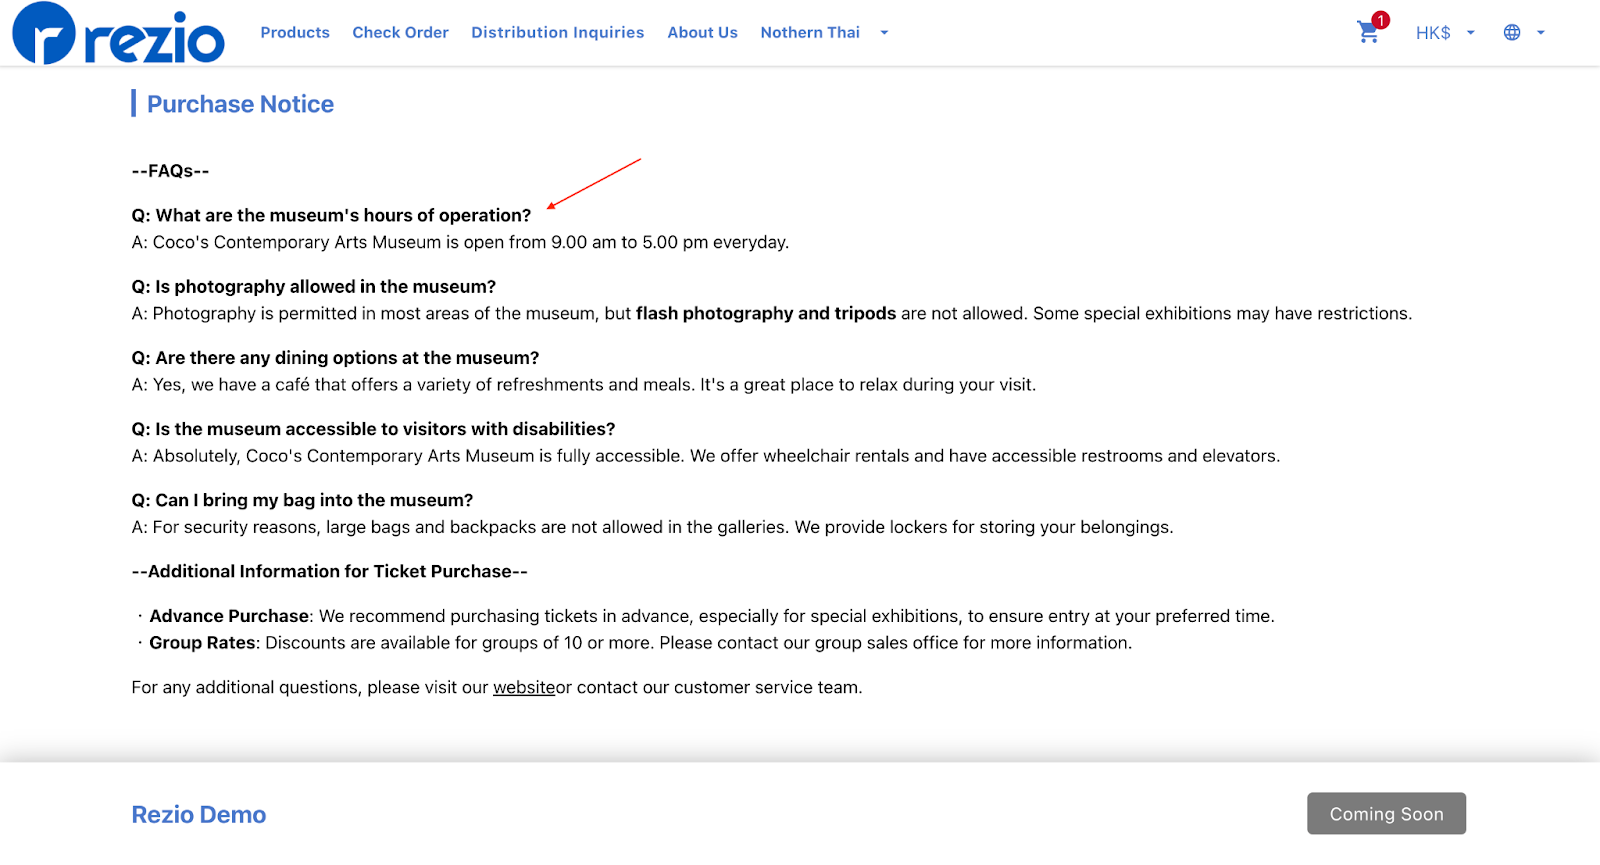
Purchase Notice
Describe information such as matters or related terms that customers need to be aware of before or after purchasing the product.
Display Location on the MySite: Below the Description section.
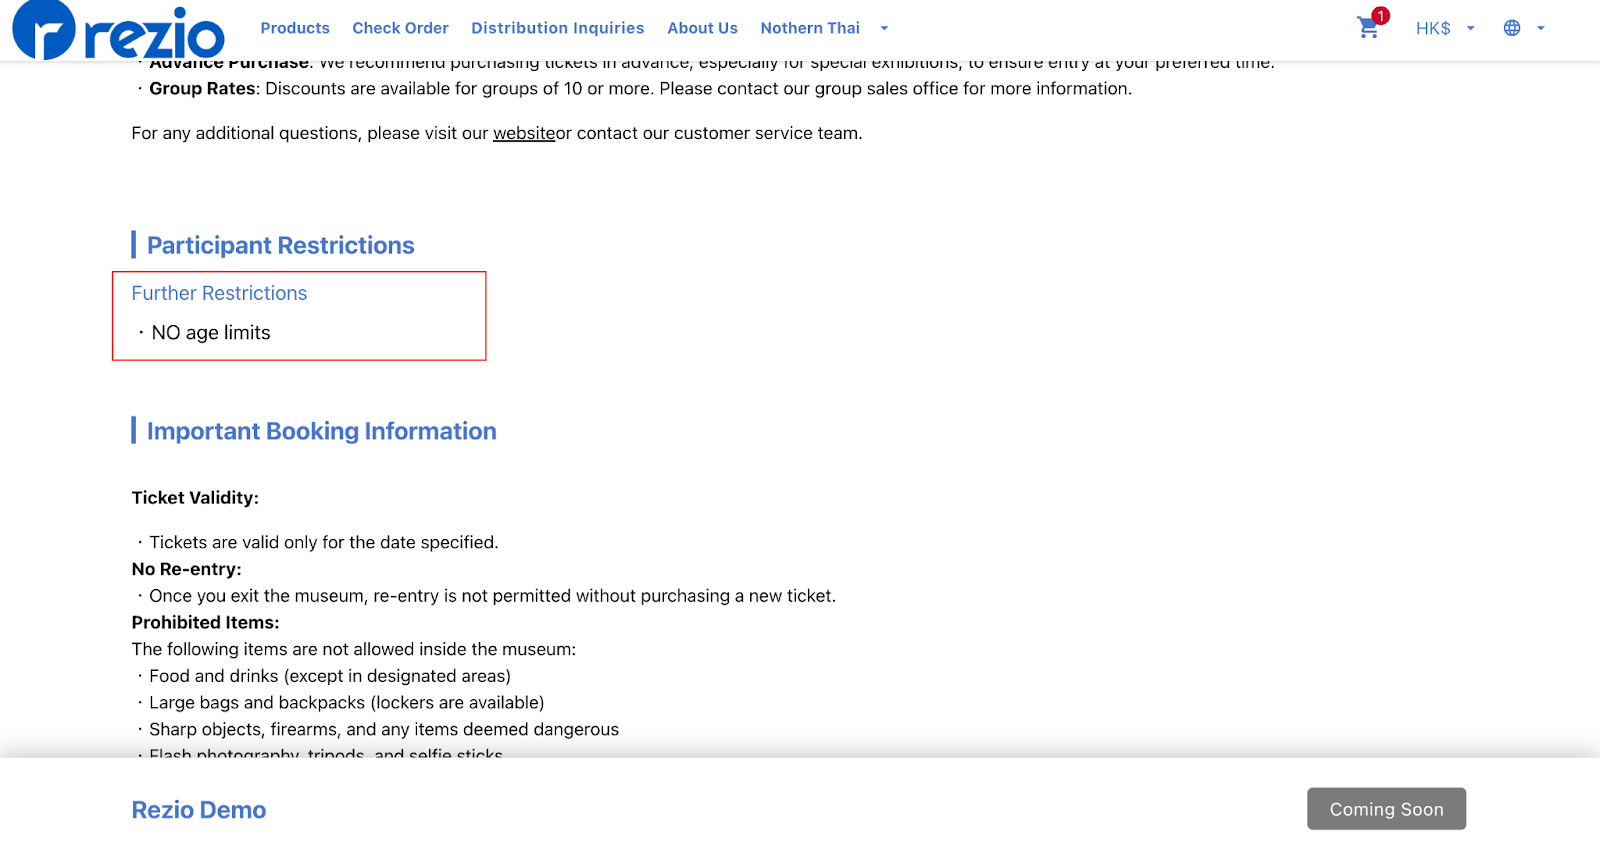
Participant Restrictions
You can describe if the product has country-specific restrictions or fill in details about the applicable audience, such as suitable ages or whether it's good for beginners.
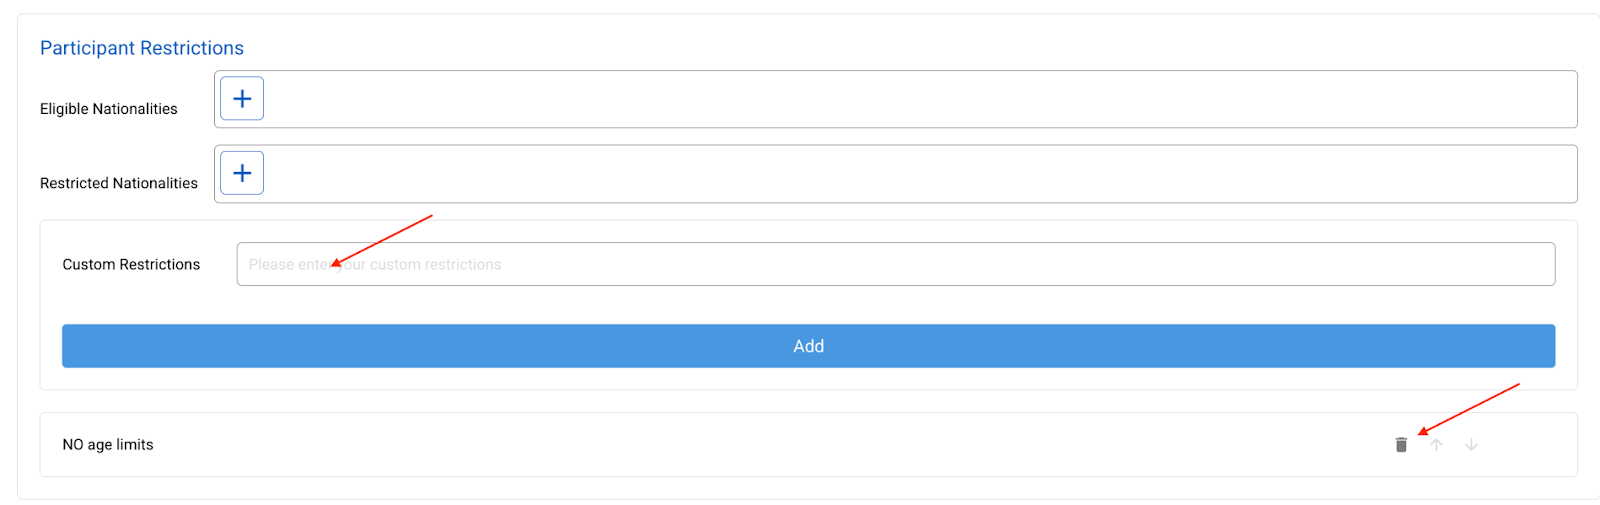
Display Location on the MySite:
Special Terms and Conditions
You can describe the relevant important notices and rules that need to be followed for participating in this activity.
Display Location on the MySite:

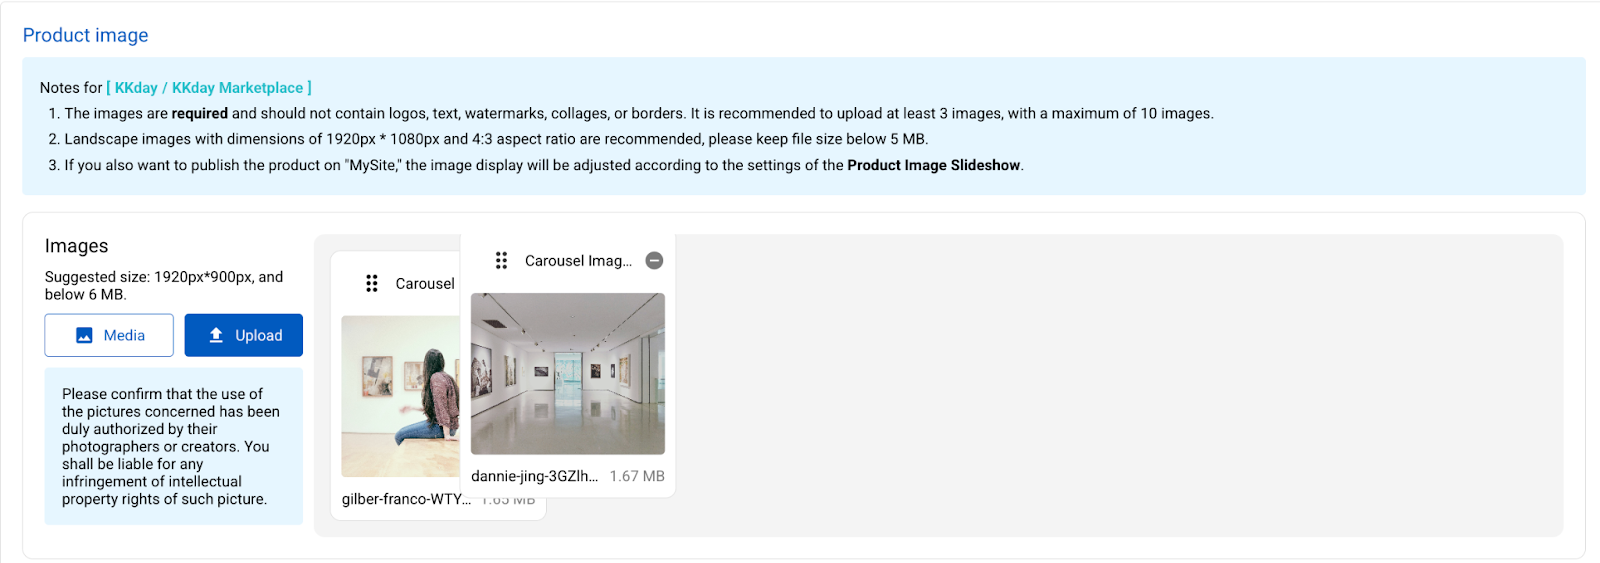
Product Images:
You can upload relevant images for this product here. The very first image you upload will become the product’s Cover Photo. If you upload multiple pictures, you can rearrange their sequence by clicking and dragging a single image to your desired position.
Notes: Every image uploaded for a product will automatically be saved to the [Product] media library, allowing you to select previously uploaded images from the [Media Library]. For related instructions, please refer to the Media Library and Image Management Guide.
Display Location on the MySite: Top of the product page.
Product Video (Youtube)
在「網址」欄貼上 Youtube 影片的網址,便能將影片嵌入到商品頁中,您也可以依照語系設定不同的影片。(若沒有指定語系,則同一個影片會在各個語言的商品頁中顯示。)
By pasting the YouTube video URL into the "URL" field, you can embed the video into the product page. You can also set different videos based on the language setting. (If no language is specified, the same video will be displayed on the product page for all languages.)
Display Location on the MySite: Below the package options

Notes: Please confirm that you have obtained authorization from the photographer or creator for the video you use. If the video cannot play normally on the product page, it may be because the video's uploader has disabled or restricted the video's embedding function. For detailed instructions, please see the Youtube Restricted Embedding Function Explanation.
Once all the required information has been filled out, click Save and Next to proceed to the next tab.
Taxes and Fees
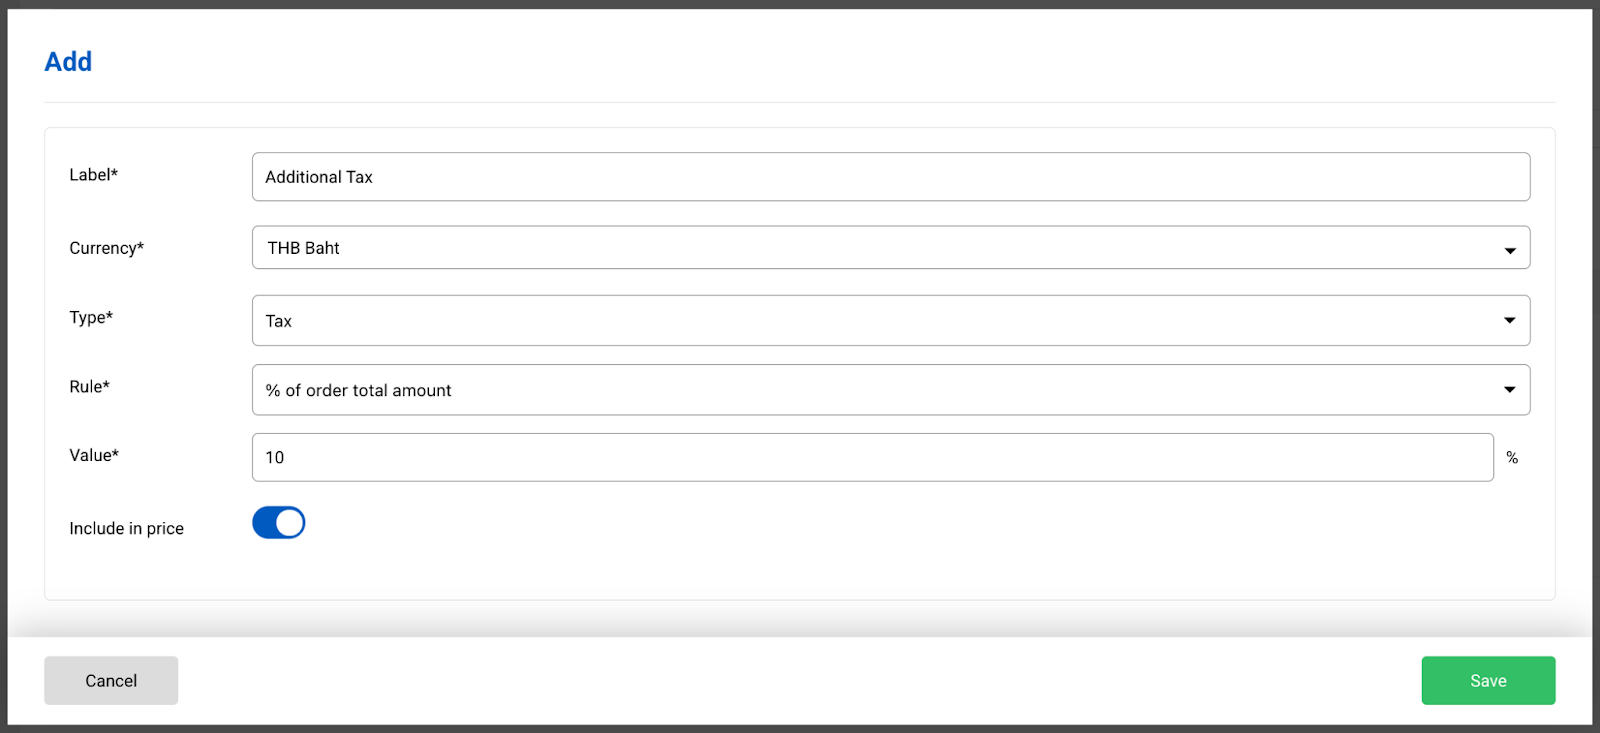
The default setting is [No Additional Tax or Fees]. You can set up additional taxes or fees required when purchasing this product as needed. The amount will be calculated automatically when customers check out on your MySite. You can also set the fee as [Included]; in this case, the fee item will only be displayed for the customer's reference and will not affect the checkout amount.
You can click [+Add] to create tax and fee items. For detailed instructions on how to do this, please refer to the Tax and Fee Usage Process.
If there are already pre-set items available, select them and then directly click Save and Next.

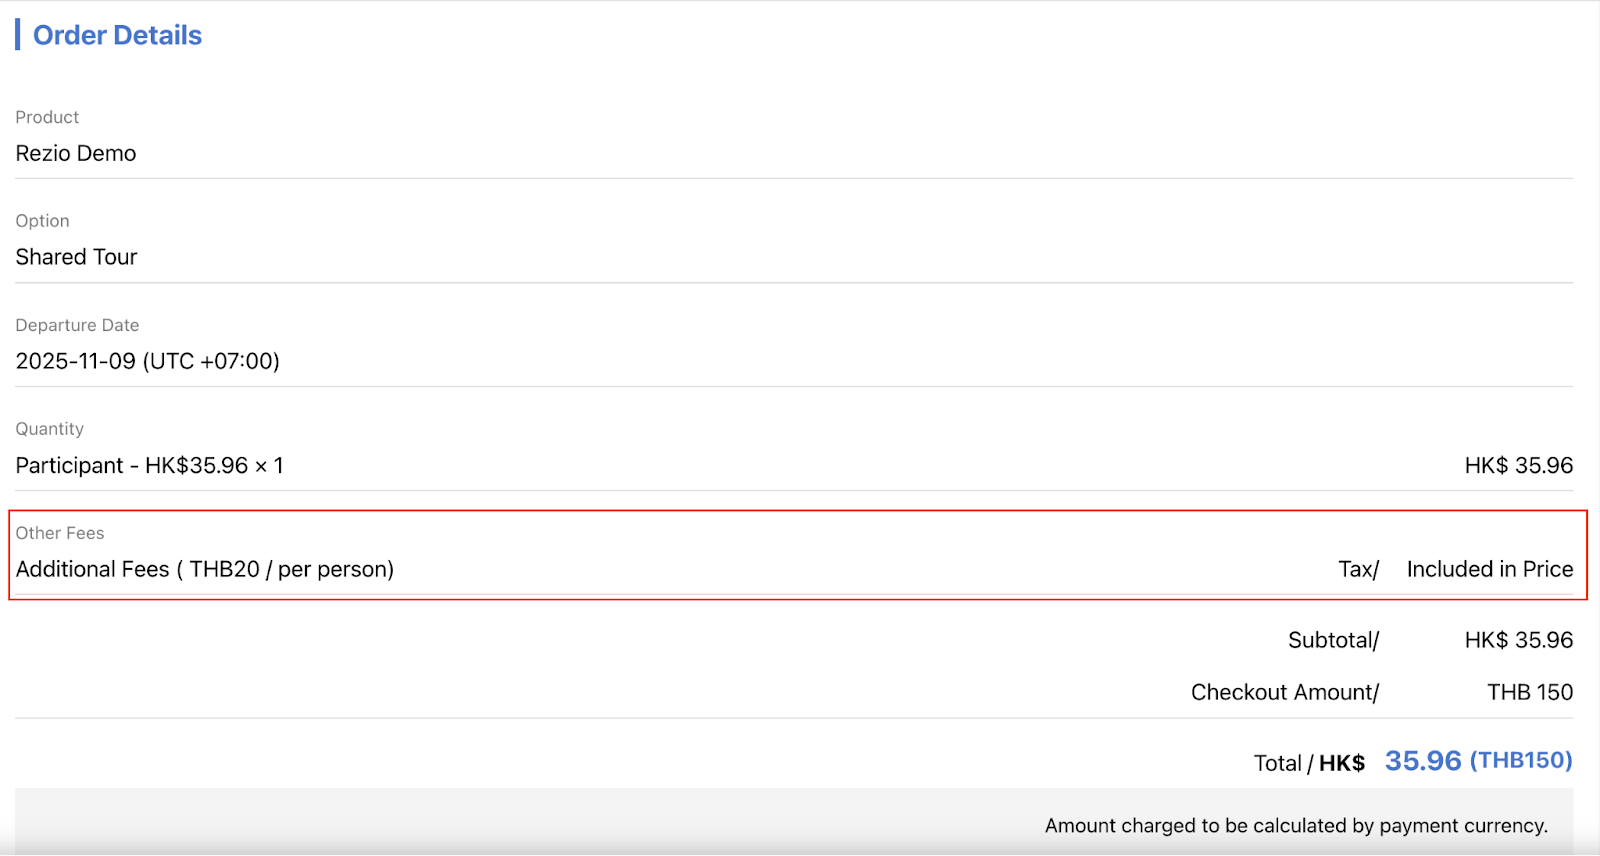
During checkout on the MySite, the relevant taxes and fees will be listed, along with information such as whether the price is already included, for the customer to confirm.
Cancellation Policy
This allows you to set the handling fees charged when canceling an order. This rule will be displayed on the product page and the order voucher, informing customers of possible fees and relevant regulations.
You can use the default options: [Non-Refundable] or [Full Refund], or click [Add] to create a new rule. For detailed instructions, please refer to the Cancellation Rule Usage Process.
You can set cancellation rules based on time or customize the rule text.

After selecting the cancellation rule(s), click Save and Next.
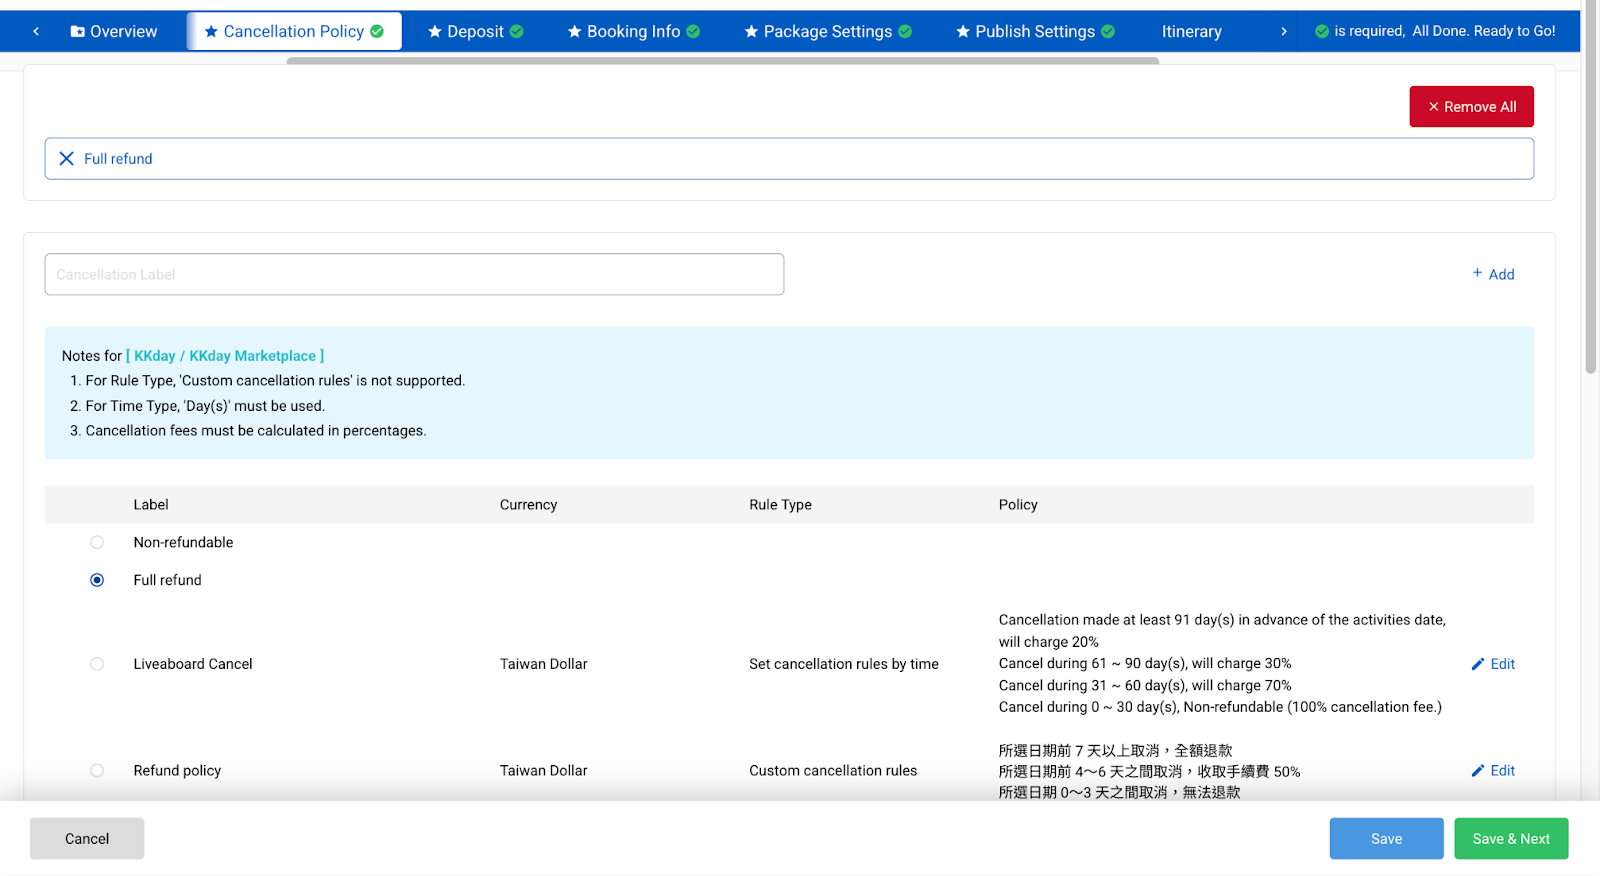
Notes: When the order source is the MySite, Distributor, or an Manual Add Order, the cancellation rule that was set for the product at that time will be displayed on the Order Details when the order is canceled. However, the actual amount to be refunded must be manually entered by the operator.

Deposit
You can set the deposit that customers must pre-pay when placing an order on your MySite, or require them to pre-pay the full amount.
The default setting is "Full Prepayment". If you have enabled online payment on your "MySite", customers must complete the payment for the order to be successful. If you select "No Deposit Required", customers can place an order without needing to pay.
Click [Add] to create deposit rules. For detailed instructions, please refer to the Deposit Rule Usage Process.
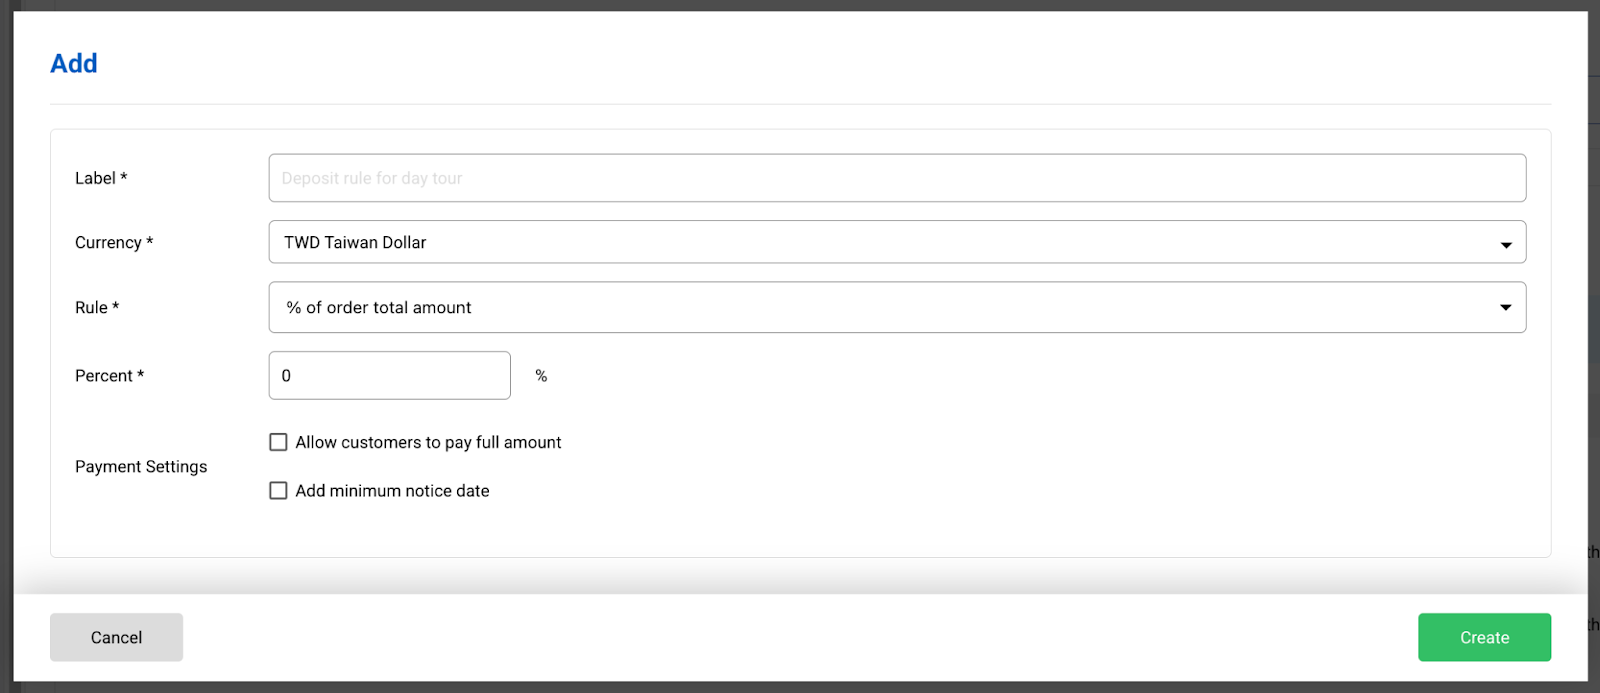
勾選完訂金規則後,點選儲存並下一步

Booking Info
This allows you to set the information that customers are required to fill in when placing an order, such as personal details, contact information, and itinerary-related requirements, etc.
Click [Add] to create a booking information template. You can select the required fields from the various pre-set selections.
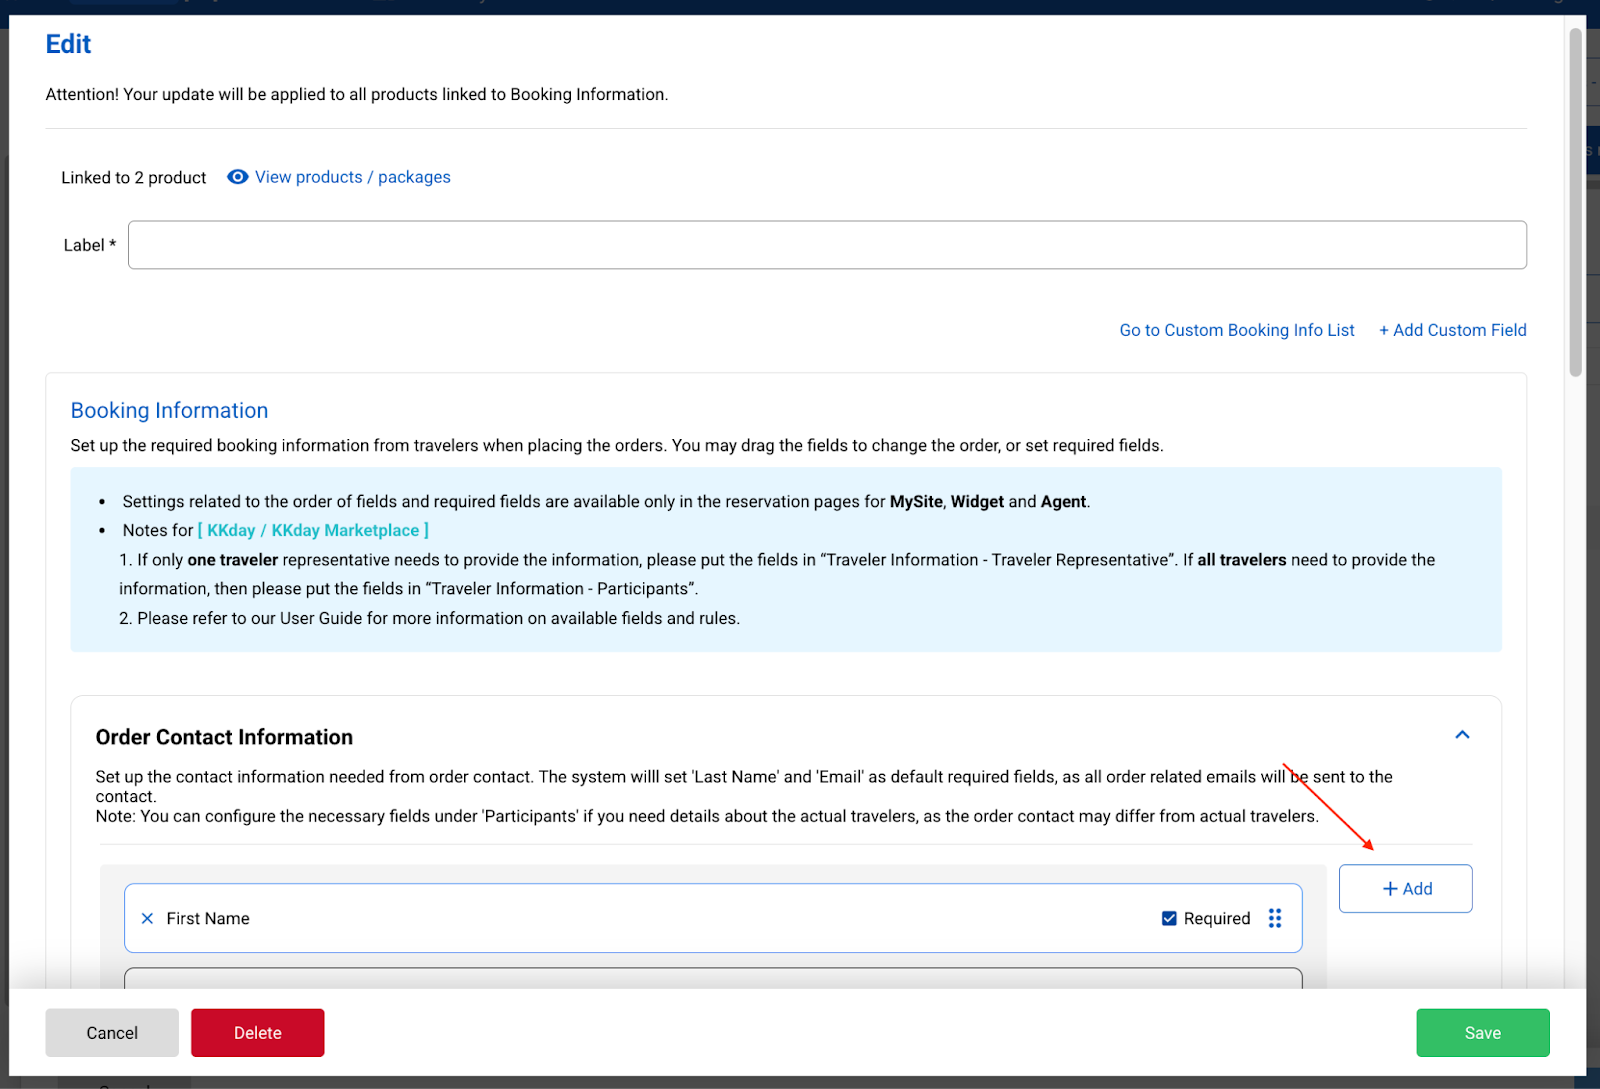
After selecting the required fields, you can drag them to your desired position for sorting.

Notes: For detailed operating instructions, please refer to the Booking Information Usage Process.
After selecting the booking information, click Save and Next.

Add Packages, Set Prices, and Complete Listing Settings
Up to this point, you have completed the basic settings for the product information. Next, you will begin setting up the content of the product you are selling, including price settings, sales calendar settings, order confirmation method, payment method, voucher settings, and more.
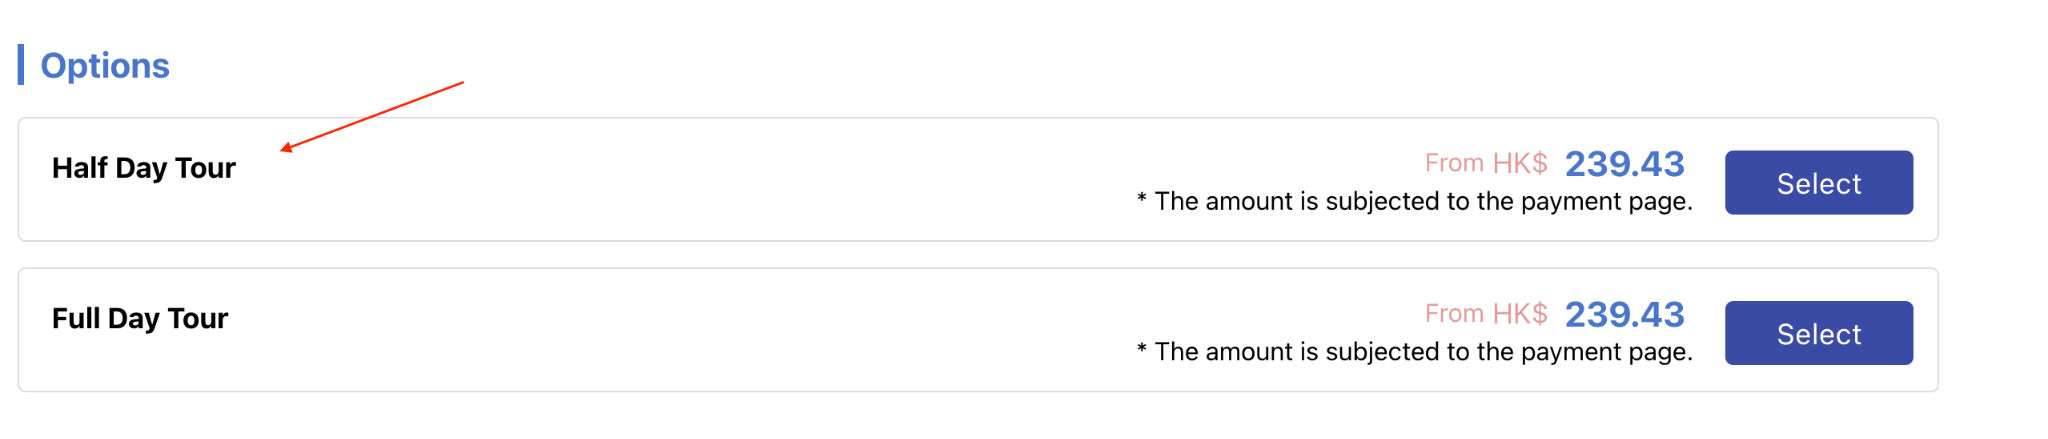
First, you need to create the [Packages] offered by this product. You can set up multiple different packages based on different product content, different departure dates, or different pricing, making it easier for customers to choose.
On the MySite product page, packages will be displayed in the [Options] section, as indicated by the red arrow in the image below:
Each package can be set up with different items that customers can select. The overall structure is as shown in the image below:
Rezio offers different configuration functions depending on the product category. Please refer to the following manuals for detailed instructions:
If your product category is Day Tour, Multi-Day Tour, Private Tour, or Activity:
For new products created after 2025/06/18, please see the New Package Creation Guide.
For products created before 2025/06/18, or products copied from old products, please see the Old Package Creation Guide.
If your product category is Ticket or Ticket (No Session), please see the Ticket Package Creation Guide.
Additional Settings
If you need to further configure content such as the itinerary, locations, transfer settings, guided tours, price details, add-on items, or attribute text for this itinerary, please refer to the New Itinerary: More Settings guide.
Was this article helpful?
That’s Great!
Thank you for your feedback
Sorry! We couldn't be helpful
Thank you for your feedback
Feedback sent
We appreciate your effort and will try to fix the article