Overview
This guide is intended to help you walk through the essential settings for creating a new product in rezio Admin. The following will cover adding product information, itineraries, sales options, pricing, cancellation policies, deposit policies, booking information, and more.
JUMP TO
- Add Product
- Product Settings
- Edit Product: Modify Product Info while It Is On-Shelf
- Translating Your Product Info
Product > Add Product
Log in to rezio Admin, and click Add Product on the menu, or click +Add in the Product List to begin product setup.

Add Product
Go to Product > Add Product.
Select a Product identity color, which will make it easier to identify a particular product in the Sales Calendar.
Select the product Category.
Note: This is a required item. If your product’s category is a Ticket, we provide two different categories. If you choose Ticket, you can set the sessions for your product, as well as set the number of Vouchers generated per Order or per Identity/Item Quantity. If this isn’t necessary, select Ticket (No Sessions).
Select a Language.
Note: Make sure you use the correct language to create the content for this product. If you choose English but use Chinese instead, your customers will see Chinese even if they select English as the website language.
Enter a Product Name, your own Product Alias, and a Product Code.
Note: Product Alias is only shown in rezio Admin for easier identification, and you can leave the Product Code blank to be generated by the system automatically. If you set up your own code, you cannot use the same code for different products.

Select the Timezone and Region where the product is based.
Note: In the Location section, Region and Timezone are required fields and Country/Territory and Place/Landmark are optional fields. It will appear on the product card on MySite as shown below.


Select the Currency of this product.
Select the settings for the Notification Email. If you choose Custom emails, it will be sent to an appointed recipient and not your customer.
Select whether to send Travel Reminders to your customer.
You can add the Vendor of this product from the Vendor List if necessary.
Click Create.


Remark: Once the product is created, you will not be able to change the category, location, language, and currency settings. Please check if your product settings are correct before continuing.
You just added your first product! Let's continue to the product settings, which consist of several sections: product description, photos, itinerary, price, and session settings.
Product Settings
Section Tabs
- Only products at ‘In Progress’ can be deleted.
- The section tabs marked with ★ are required steps to set up a product. Rezio will remind you how many required steps are left on the top-right corner.
- When all requirements are completed, “All Done, Ready to Go!” will appear.
- A green checkmark will appear on the tab when you have completed that section.


Introduction
- Enter information about this product with the fields for Brief introductions, Highlight, Descriptions, Purchase Notices, Special Terms and Conditions, and more. The ones marked with asterisk are required fields.
Note: The left column of the text editor is the input column, and the right column is the preview column. For detailed instructions, please refer to Using the Text Editor.
- User restrictions: Select if this product is available to or restricted for customers with specific nationalities, or you can enter other restrictions if required.
- Click Next to save data and go to the next section.


Image/Video
The first image will be the cover photo for this product. You can change it by arranging the order of the photo

To add video, copy and paste your YouTube video URL here
Select Video Language (optional) and click Add
Click Next to continue
Remark: The URL site format must be https://youtu.be/
Drag image files to the upload area or choose one from your computer

Taxes & Fees
- You can select the applicable taxes and fees for this product and inform your customers whether these costs are included in or excluded from the price.
- Enter keywords to filter and find the tax & fee item you wish to apply.
- You can select multiple items to link with the product, and the selected ones will be shown at the top. If there are no suitable options, you can click +Add to create your own.
Note: For more details on adding taxes and fees, please go to Admin Settings | Taxes & Fees.
- Click Next to save the data and continue.

Cancellation Policy
- You can select the default option, Non-refundable, or select Full Refund or create another cancellation policy.
- Only one option can be linked with the product as a cancellation setting. The selected option will be shown at the top. If there are no suitable options, you can click +Add to create your own.
- Click Next to save the data and continue.

Note: For more details on adding a cancellation policy, please go to Admin Settings | Cancellation.
Deposit
- You can select the default option, No charge, or select Full amount or add another custom deposit.
- Only one option can be linked with the product as a deposit setting. The selected option will be shown at the top. If there are no suitable options, you can click +Add to create your own.
- Click Next to save the data and continue.

Note: For more details on adding deposit options, please go to Admin Settings | Deposit.
Booking Info
This section will help you set up the fields for your customer to enter necessary traveler information.
Booking Info options create the columns for your customer to enter traveler information. If you’re unsure which options should be included, you can use keywords to find an existing template.

- Click Edit to see or modify the template. If you can’t find suitable options, click +Add to create your own.
Hint: For more details on adding booking information, please go to Admin Settings | Booking Information.
- If you need more information to add, please click +.
- Click the right upper right corner if you want to custom your own options.
- Click Next to save and continue.
Sales Options
- Sales Option Switch: If this switch is turned to blue, the sales option is available to customers, and when the switch is gray, the option is unavailable.
- Enter the Name and Description of this sales option.
- Select Availability Type: You can set the availability by session, by sales option, or unlimited.
Note: If Availability is set to by session, each session’s availability will not be affected by other sessions.
If Availability is set to by sales option, and you have multiple sessions, all the sessions will share the same availability.
If Availability is set either by session, and allocate them by identity/item or by sales option, and allocate them by identity/item, then the availability of the session / sales option can be allocated to each identity/item.
For more information please refer to Admin Product | Availability Type..
- If the product category is Ticket, you will have to set the Ticket Validity Type.
Note: If the validity type is “Ticket is valid and must be exchanged only on the booked date,” you will also have to select whether redemption before session is allowed. You will also have to set the Ticket Expiration Mode, which sets whether a ticket can still be used after the booking date.
For more information, please refer to Admin Product | Rules Of Ticket Validity
- Click Add, and this sales option will appear in a list below.
- You can add more sales options as needed. Once done, review any the sales options added and click Next to save the data and continue.
- You can also upload a representative picture (or add it from the media) for the package so that customers can easily identify it. If there is a representative picture of the set package, the display effect on the product page the display will be as follows:(PC)
(mobile)
Reminder: Once a sales option is linked to a pricing rule, the product can no longer be deleted.
Sales Options
Note: If Availability is set to by session, each session’s availability will not be affected by other sessions.
If Availability is set to by sales option, and you have multiple sessions, all the sessions will share the same availability.
If Availability is set either by session, and allocate them by identity/item or by sales option, and allocate them by identity/item, then the availability of the session / sales option can be allocated to each identity/item.
For more information please refer to Admin Product | Availability Type..
Note: If the validity type is “Ticket is valid and must be exchanged only on the booked date,” you will also have to select whether redemption before session is allowed. You will also have to set the Ticket Expiration Mode, which sets whether a ticket can still be used after the booking date.
For more information, please refer to Admin Product | Rules Of Ticket Validity


(mobile)

Reminder: Once a sales option is linked to a pricing rule, the product can no longer be deleted.
Publish Settings
Edit publish settings

- Select how and when the bookings will be confirmed: Instantly, Automatically, or Manually.
- If you choose to instant confirm, the system will automatically confirm at the time. You can choose N days and N hours (1 day = 24 hours) from the date of the order or from the date of departure.
- If you choose Manual Confirm, it must be manually confirmed by the person. The confirmation time set here is only for customer reference (displayed on the product page and letter). - Set the Booking Cut-off Time by session start time or end time:
By session start time: - Specific: To make all the sessions on a given day stop accepting bookings at the same time, set the cut-off time to By Session Start Time and Specified time.
The default is 0 day(s) 12:00 AM. If a product’s session has a set time slot, then 0 day(s) = the day of the activity, and 1 day(s) = the day before the activity.
If your session’s setting is Allday, then 0 day(s) = the day before the activity/session, 1 day(s) = two days before the activity/session.
- Relative: 5 Minutes is the smallest unit. If the Booking Cut-off Time is set to 0 day(s) 6 Hours 0 Minute, customers will not be able to book that particular session when it is 6 hours before the start of the session.
By session end time: Only Relative time is available. If the Booking Cut-off Time is set to 0 day(s) 0 Hour 30 Minutes, no matter whether the session has already started or not, booking can still be made until 30 minutes before the end of the session.
Note: If the Category of the ticket is Ticket (No Sessions), then Booking Cut-Off Time will not appear in this section. Instead, there will be Ticket Sales Settings tab. Please refer to the Admin Category | Ticket (No Sessions) for further information. - Select the Available Booking or the Bookable Time by Customers.
Unlimited (Default): Customers can book the itinerary as long as the selling date is still open on the sales calendar.
Only sessions on the day of booking: No matter when the customer enters the booking page, they can only book the session with session time between 0:00 ~ 23:59 on the day of the itinerary timezone.
Example: If the activity’s timezone is Taiwan (UTC +08:00), from 12:00 AM on the itinerary day, customers in Taiwan can only see that specific day’s sessions. They can only see the sessions for the next day until 12:00 AM on the next day. But for customers in Thailand (UTC +07:00), because Thailand is one hour behind Taiwan, customers can begin booking their sessions at 11:00 PM Thailand time for the next day’s session.
Specified X day(s) Y Hours: the itinerary with session time from 00:00 AM on the same day to X day(s) Y Hours will be available to be booked by the customer.
Example: If the activity’s timezone is Taiwan (UTC +08:00) and the Available Booking is set as Specified, The furthest bookable time to be 1 day(s) 03:00 PM, for customers in Taiwan, the customers can see the activities that is held from 00:00 AM that day to 03:00 PM the next day.
Relative X day(s) Y Hours: no matter which timezone the customers are in, they can only book the itinerary with session time that is within X day(s) Y Hours since they go to the booking site.
Example: If the activity’s timezone is Taiwan (UTC +08:00) and the Available Booking is set to 1 day(s) 3 Hours, it means customers can book the activity with the session time from the time they access the booking site up to session time in the next 27 hours.
Reminder: Both the Booking Cut-off Time and Available Booking will affect the dates of the sessions that can be booked by the customers. As shown in the diagram below, if the itinerary’s selling date is still open in the Sales Calendar, sessions that have passed the Booking Cut-off Time and Available Booking will not be bookable by the customers.
For more information, please refer to Admin Product | Adjust Session's Bookable Time.

4. Select the Payment Methods accepted for this product.
Hint: If you do not see the payment method option you’re looking for, please go to Settings > General > Payment to check if you have enabled the relevant payment setting. For more information, please refer to General Settings: Payment.

Voucher Settings
The supported voucher types include None, rezio Voucher, Custom Voucher, Upload Voucher Files, and OTA Voucher.
Custom Voucher is only available for the rezio Rise plan and above, for more information on how to create a custom voucher, please go to Admin Settings | Creating Customized Voucher. For more details on voucher settings, please go to Admin Product | Voucher Setup.
rezio Voucher (Use default template)
- You can choose to Use rezio QR Code or Upload Customized QR Code. Contact your rezio Expert if you want to use an API QR code or Barcode.
- Select how the voucher will be generated and how many times one voucher can be redeemed.
For example: when the booking is for 3 adults, if you choose By Order, only 1 QR code will be generated, and if you choose By Identity/Item Quantity, a total of 3 QR codes will be generated.
Note: When the Rezio Voucher is selected with a combination of Use Rezio QR Code and By Identity / Item Quantity, an additional All-in-One Redeem QR Code will be displayed above the voucher. Scanning this QR Code will directly write off all the vouchers in the order at once, which is convenient for groups to use when entering the venue together, making on-site check-in more efficient. - Swipe to Redeem combines the rezio Voucher and rezio QR code functionality, wherein you can choose to allow customers to self-redeem their vouchers on the rezio website or not. This option must be used in conjunction with switching on Swipe to Redeem on the Sell Online - Vouchers module.
- Select a Voucher Language.
- Custom: Select the language from a dropdown list you wish to use for the voucher. This language will display regardless of the language used when your customer makes the booking. - According to the customers' order languages: The voucher will be in the same language as a given customer's language.
- Select How to Send a voucher to your customer. You can choose to send a voucher by the following methods:
Send Automatically with Order Confirmation: Automatically send the voucher simultaneous with an order’s confirmation. E.g. if a booking is manually confirmed, the voucher will be sent after you manually confirm the order
Send Automatically at a Specified Time: Automatically send the voucher at a specified time
Send Manually: Send the voucher by email using rezio Admin.
Times can be set by N days and N hours, either From Order Date or Before Departure Date. This time will be displayed on the product itinerary of the booking website.
- Select the instructions on How to Use the voucher. You can choose from the default text or enter your own instructions.
- Click Next to save and continue.

Note: To successfully enable the Swipe to Redeem function, don’t forget to go to the Sell Online - Vouchers module and enable Swipe to Redeem switch.

After confirming that both the Publish Settings and the store have enabled the Swipe to Redeem function, the customer will see a Redeem slider when they open the web Voucher. If customers have multiple vouchers, they can also Redeem them in groups.

Custom Voucher
Most settings are the same as for rezio Voucher, but with a Custom Voucher you’ll have to select the voucher template to be used.
- You can select from existing templates or create a new one. Please refer to Admin Settings | Creating Customized Voucher for more details.
- If you want to use for a different language, click + to add another language.


- Select the template for your selected language.
- Click Add to save these settings.
- You need to set a voucher template for each sales option separately, but you can use the same template for all options. Once you’re done, click Save.
Upload Customized QR Code
If you choose to use Customized QR Code, you will have to upload it under the Order Detail page after the bookings are made. Note the QR code cannot be redeemed through the rezio App.
Add Pricing
You need to set the pricing for each sales option individually. You can bind one or multiple pricing policies to the same sales option, but once bound to a pricing, the sales option cannot be deleted.

Note: If you set the Advertising Price, this price will display on its MySite product thumbnail, and it will serve as the lowest price for Google to crawl. If you leave it blank, rezio will calculate from all unit prices in the associated pricing policies and set the lowest price as the advertising price. In the following, we will show you how to set different pricing policies for weekdays and weekends.
If the Category of the ticket is Ticket (No Sessions), then this Add Pricing tab will not be displayed. Instead, there will be Ticket Sales Settings tab. Please refer to the Admin Category | Ticket (No Sessions) for further information.
Custom Advertising Price
By inputting a Custom Advertising Price, this price will display on this product’s MySite thumbnail, and it will serve as the lowest price for Google to crawl. If you leave it blank, rezio will calculate from all unit prices in the associated pricing policies and set the lowest price as the advertising price.

The calculation logic of rezio’s advertising price is as follows:
If a pricing rule type is By Person and a price is set per Participant, then the lowest price per Participant will display. For example, if a price rule is NT$600 per Participant and NT$1000 for a two-person ticket (multi-person Identity), the display price will be “From NT$600”
If pricing rule is set per Adult (rather than per Participant), the lowest price per Adult will display. For example, if a price rule is NT$600 per Adult and NT$300 per Senior, then the display will be “From NT$600”
If there is no pricing rule type for Adults or Participants, but there is a pricing rule for other Identities, the lowest price per person for all identities will be displayed. For example, if a price rule is NT$1000 for 2 people, NT$1800 for 4 people, the display price will be “From NT$450”
If the pricing rule is By Item, and not By Person, the lowest price among all items will be used as the default advertising price. For example, if a selling price is NT$600 for a full ticket and NT$300 for half/discount ticket, the display price will be “From NT$300”
Linking Sales Options
In this section, learn how to set different pricing policies for weekdays and weekends. First, let’s set up the pricing for weekdays.
Step 1: Select Pricing Policy
To choose from existing pricing policy templates, click Edit to see or modify the product’s content. If there is no suitable option, click + Add create your own
Note: For more information on how to create pricing policy, please go to Admin Settings | Pricing Policy for more details.

Step 2: Link Sales Option to Pricing Policy
- Select Weekly as Binding Type and click Sat and Sun to disable weekends (blue = enabled, grey = disabled).
- Click Add to bind, and this policy will appear in the Bound pricing policy section below.
 Next, let’s set up the pricing for weekends.
 - Go back to the Select pricing policy section and choose the one you want to use for weekends.
- Select Weekly as Binding Type and disable Mon to Fri, and leave Sat and Sun blue. (Blue = enabled, Grey = disabled).
- Click Add to bind, and this policy will appear in the Bound pricing policy section below.

- Now that we’ve completed the settings for weekdays and weekends, click Next to continue. If you have multiple sales options, please make sure to set up each one separately.

Remark: Besides Weekly settings, you can also set the binding type to
Specific Date: Suitable for setting different prices for special holidays or promotional events.
Date Range: Suitable for setting different prices for peak-season and off-season.For more details, please go to Admin Settings | Pricing Policy.
- Advance Settings
When linking a Sales Options with a Pricing Rule, you can also set the Advertising Price for the Sales Option, Limitation per Booking and Limitation for Identity Per Order.

Advertising Price for the Sales Option: Beside the Advertising Price for the Product, you can also set the advertised price for the sales option. This price will be displayed on the product page.
Limitation per Booking: Set the maximum and minimum total booking quantity in a single booking
Example: If there are two options in a package, Adult and Child, and the Limitation per Booking is set to a minimum of 1 and maximum of 20, the customer must choose at least Adult x1 or Child x1 to book the itinerary, and the sum total of both options cannot be over 20.
Limitation per Identity per Order: Set the maximum and minimum booking quantity for each Identity option.
Example: If the Limitation per Booking is set to Unlimited, but the minimum quantity of Adult is set to 1, the customer must select at least Adult x1 to book the itinerary.
Booking Constraints: If there are multiple options in the package (e.g. Adult and Child), set a limit on the number of combinations between the options
Example: If the Constraint is set to 1 Child must be accompanied by 1 Adult, then when the customer selects Child x1, at least Adult x1 must be selected in order to book the itinerary. When Child x2 is selected, then at least Adult x2 must be selected in order to book the itinerary.
Add Session
Note: If the Category of the ticket is Ticket (No Sessions), then this Add Session tab will not be displayed. Instead, there will be Ticket Sales Settings tab. Please refer to the Admin Category | Ticket (No Sessions) for further information.
You need to set the sessions for each sales option to create the Sales Calendar. Once the Sales Calendar is created, this product cannot be deleted.
Reminder: Only a New Sales Calendar can be added here. To modify an existing sales calendar, please go to the sales calendar in the main menu to modify it. For further information, please refer to Admin Publish | Sales Calendar..
- Click on the sales options on the top of the page to start adding sessions or to edit it.

- Select the Availability Type for this session. The interface here will change depending on the Availability Type that you choose. If you select Set availability by session, please set the Session Availability in the Add Session tab.
Note: For more information about Availability Type, please refer to Admin Product | Availability Type
- Select the period available for sale in Session Time Range (from - to).
Remark: For tickets, the session time range cannot exceed the ticket validity date.
- Session Time Slot: Select All Day or uncheck the box to create sessions in a specific time slot.
- Click Add, and the session will appear in the section below.

- You can leave the value in Apply to as the default setting or choose the days and times of the week when the sessions will be available. For example, if the sessions are for weekdays only, you can click on Sat and Sun to disable them (blue = enabled, grey = disabled).

Resource
If there are resources associated with this product, such as a tour bus or special equipment, you can click on + to add them here. If not, just move on to the next step.
Remark: For more information on how to create resources, please go to Resource Settings.
After you have completed all the settings, click on Save or Next to preview the Sales Calendar. When you are done reviewing, click Save to continue.

If there is no problem, click "Save” and the system will start to generate a calendar. If there are a large number of sessions and a long sales period, it will take a while to complete the work.
When each package is successfully created for the first time, the system will ask whether to on-shelf it to Mysite directly. If you want to publish it after all the setting is set, you can also click Later, and then go to "Status Settings" to make adjustments.
All Done! You can see the sessions created on Calendar on the next page. The status ON indicates it’s ready for sale.
Note: Not seeing anything on the calendar? Try refreshing the page.
At this stage, you have successfully created a product. We suggest you add some images or video to make the product more attractive!
More Settings
Next, continue by setting up the itinerary, location, pickup service, guide services, price details, add-on items, and tags for this product. You can find instructions in Product Setup: Additional Settings.
Itinerary
- Select the duration of the itinerary under Duration.
- Choose whether the event includes Breakfast, Lunch, or Dinner.

- Choose to add an item by Time Slot or Bullet Point. If you choose to add by Time Slot, adjust the time to the starting time of the item.
- Input a description of the item in the text field.
- Choose a photo to go with the item (optional).
- Time slot without photo
- Photo with a bullet point
- Click Add and the added item will appear below the Add button.
- When you have finished editing the itinerary, click Next.
Hint: The order of items is adjustable by clicking the up and down arrows, and removable by clicking the bin icon. Note: The itinerary will be shown on MySite as below.


Location
You can add destination and meeting place details to make your customers aware of the event location. The steps to set up Destination and Meeting place are the same. The location settings for destination will be used in the following example.
Note: To display the destination or meeting place, switch the toggle button to blue. When the button is gray, the information won’t be shown on MySite. To expand the field, click the + sign, and to hide the field, click the - sign.

- Enter the Destination / Meeting place name.
- Enter the location’s Address.
- Input a Note and fill in Latitude and Longitude (optional).
- Choose Use Your Image or Use Google Maps (optional).
- Click Add and the added location will appear below.

- When you’ve finished editing the location settings, click Next.
Hint: After entering the address, click Generate Map. The system will automatically generate and pinpoint the location on Google Maps. You can also enter latitude and longitude to help the system generate a more accurate location on Google Maps. 
Note: When the toggle button is enabled, the location shown on MySite will display as below. 
Pickup
For sessions that provide a pickup service, you can set up pickup routes for your customers to choose from according to the session they select.
If you have already created pickup routes for other sessions, you can type keywords in the search bar to find your required pickup option. If you can’t find any suitable pickup routes, you can add a new pickup route in the settings.

All the pickup routes successfully added will be shown in the list.
Note: For more details on adding pickup routes, please go to the Pickup tab.
- Select the pickup route required.
- Click Next.

Guide Services
In the Guide Services section, you can select the guide language for the event.
- To add, click the + sign and select your desired guide language
- To remove a language, click the x sign
- To remove all the languages, click xRemove All, and to select all languages, click +Select All
- When finished adding, click Confirm

Price Details
In the price details section, you can list down the price details of the event to inform your customers what kind of fees are price inclusive or exclusive.
You can choose to add the built-in fees or type in customized fees. When finished adding, click Next.

System
- Click the + sign in the Fees included or Fees excluded bar and wait for the fee list to appear. To remove a fee, click the x sign.
- Select the fees. You can use the filter function, or enter keywords to search for the fee you would like to select.
- After selecting all your required fees, click Confirm.

Custom
- Enter the item name to be fee inclusive in the custom bar.
- Click the + sign and the added item will appear below the custom bar. To remove a fee, click the x sign.

Note: The price details will be shown on MySite as below. 
Add-ons
In the add-on section, you can set up add-on options if you provide other purchase options on top of the base product.
If you have already set up many add-on options, you can type keywords in the search bar to find the add-on option required. If you can’t find any suitable options, you can add a new add-on in the settings.
All the add-on options successfully added will be shown in the list.
Note: For more details on creating add-ons, please go to Admin Settings | Add-on.
- Select the add-on options required
- Click Next

Tags
If you wish to categorize your products for your customers to find a suitable product, you could add tags along with your product, including product type, recommended age, skill level, intensity, place/landmark, and more, or you can even customize your own tags.
To add a tag:
- Click the + sign to enter the tag list.
- Select desired tags and click Confirm.

- Review your selections and then click Next.

Excellent! Your product is all set for sale.
Edit Product: Modify Product Info while It Is On-Shelf
After the product is on-shelf, modifying various settings such as the itinerary information, date, or price will take a certain amount of time to upload and update on MySite. Keep in mind these modifications will not affect the bookings that have already been received.
In order to begin editing an on-shelf product, simply go to Product > Product List. Click on the product you want to edit to begin.
The following modifications are possible:
Edit product information: Besides the grayed part in the Basic Settings, yourAvailability Type in the Sales Options and deletion of your product, you can change any of your product information. These changes will update after you click Save or Next. Likewise, you can click the upper-right corner Refresh MySite button after editing, to ensure the final edits are updated.
Edit price and information: To edit the price and time of an on-shelf product, go to Sales Calendar (see more at Admin Publish | Sales Calendar). However, if the Category of the Product is set to Ticket (No Sessions), you can modify it directly within Edit Product in the Ticket Sales Settings tab

Note: If you want to take a product off the shelf as you make your edits, you can temporarily remove the product from the shelves in the Channel Manager. Please refer to Admin Channel Manager | Channel for further details.
Translating Your Product Info
If you wish to provide a multilingual interface for foreign customers, you can also translate your product information shown on MySite into different languages using Rezio Admin.
- Go to Settings > Translation.
- Click on the product for which you wish to add a translation to enter translation mode.
Hint: All the products with complete settings will automatically appear in the translation section. You can enter keywords or use the filter function to find your product. Note: For more details on the translation section, please go to Admin Settings | Translation.
- Click the + sign and select the language you want to translate into and click.

- After confirming, you can start translating in the corresponding text box.

- When you have finished translating, click Save.

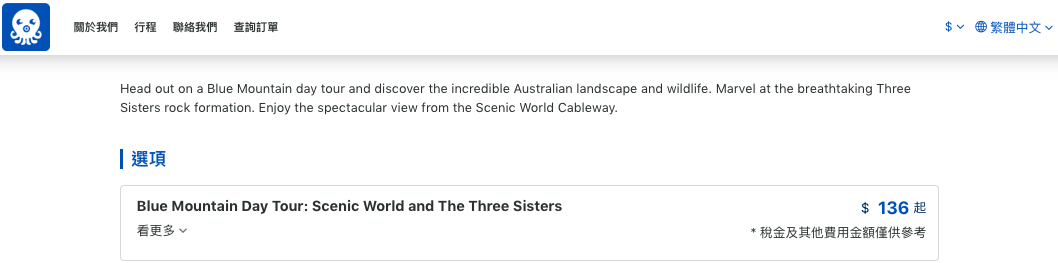
Remark: Only the system built-in content will change according to the language your customer selects. If you used English for your product setup and you did not translate your content in the translation section when your customers entered your MySite, they will only see the product information in English no matter which language they choose to view (as shown in the below photo).
Note: It is recommended to complete all translations of the product details to provide clear information for your customers. 
Was this article helpful?
That’s Great!
Thank you for your feedback
Sorry! We couldn't be helpful
Thank you for your feedback
Feedback sent
We appreciate your effort and will try to fix the article